How to Use MetaMask: A Guide for Filipinos
Your gateway to DeFi and Play-to-Earn blockchain games. Learn how to get started with MetaMask here.
MetaMask is a highly popular Ethereum wallet that is often the gateway to many decentralized apps and Play-to-Earn blockchain games. Put simply, if you are thinking of going through the rabbit hole that is DeFi and blockchain games like Axie Infinity, it’s important to be able to use and utilize MetaMask.
This article is a simple MetaMask guide specifically for Filipinos because I will be using local onramps and offramps in the example. Of course anyone can use this guide as well.
Also, this article is for informational purposes only and does not constitute investment advice.
What can you do with MetaMask?
MetaMask allows you to interact with many DeFi protocols and blockchain games. And because the majority of them are in Ethereum, you can go in and out anytime. At its most basic. Here’s what you can do with MetaMask.
- Store your Ether
- Store your ERC-20 Coins
- Transfer tokens to another Ethereum wallet address
- Buy tokens (through partner firms)
- Swap ETH to other coins and vice versa
With MetaMask as your wallet you can also do the following:
- Interact, buy and sell on decentralized exchanges like Uniswap
- Interact and start lending/or saving ETH (with Interest) on protocols like Aave
- Receive airdrops
- Interact and play blockchain games like Axie Infinity
- Buy NFT like crypto art or music in sites like Rarible and OpenSea
MetaMask lives as a browser extension and a mobile wallet. This article will primarily center on the desktop (browser extension) version of MetaMask. We still hesitate to use MetaMask on mobile devices because of the prevalence of scams — such as the copy and paste scam where a malware will change the address you copy on your clipboard. Of course, PC has that problem as well but with the desktop version, you can check the wallet address to the letter.
How to Get Started with MetaMask
1) Install MetaMask
Download MetaMask here. Make sure you are on the official website which is metamask.io. For this activity, we will download on Google Chrome.
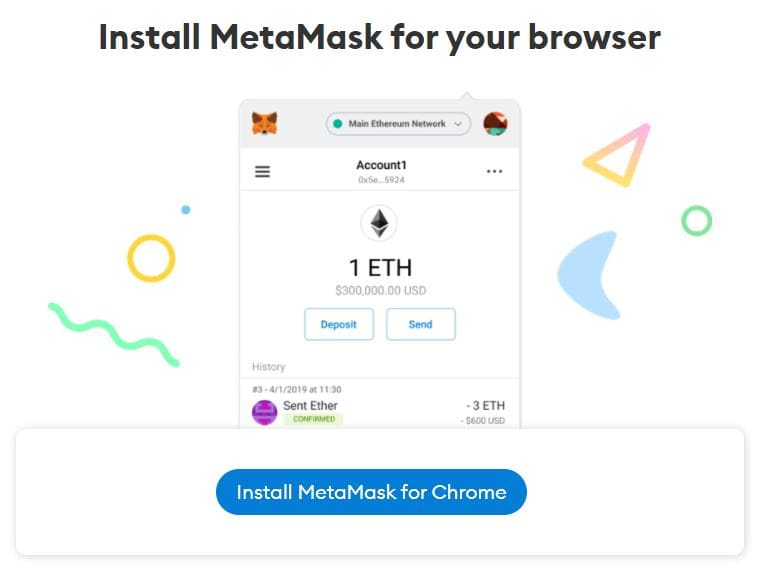
Click the “Install” button then “Get Started”. Then proceed to the next step.
2. Create a New Ethereum Wallet.
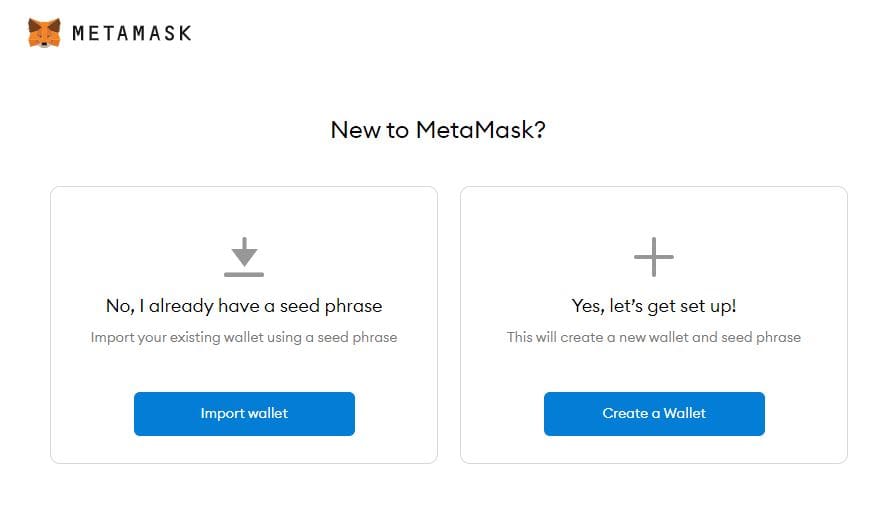
MetaMask will ask you to import a wallet or create a new one. Let’s proceed with the 2nd one. Click “Create a Wallet.”
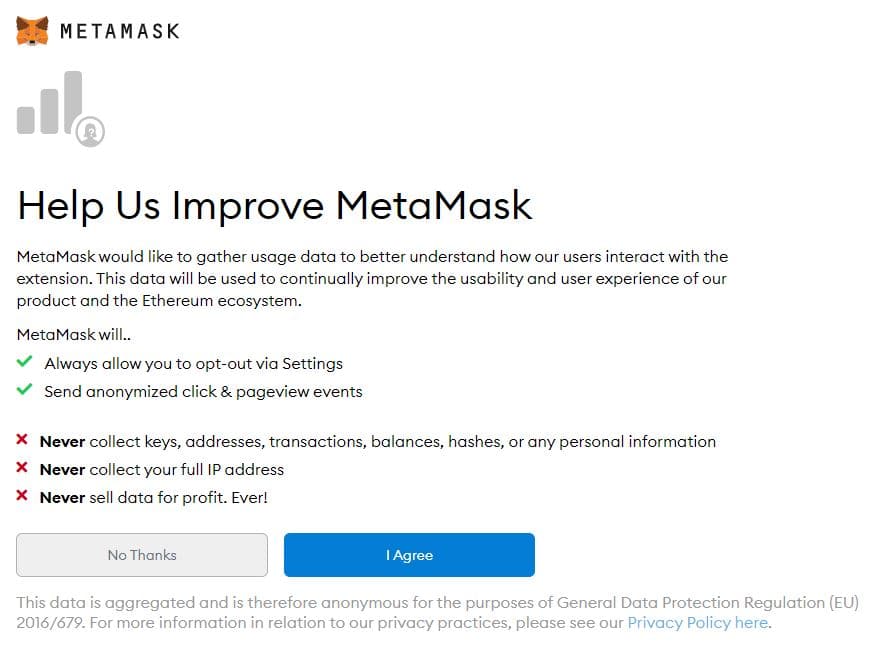
After clicking “Create a Wallet,” it will ask you to agree or disagree with feedback sharing to help improve MetaMask. Select your choice to continue.
3) Create a Password.
The password will be your primary way to unlock your MetaMask wallet. Make sure to keep this safe and away from prying eyes. It will be best to create a very random password that people and robots will not be able to guess.
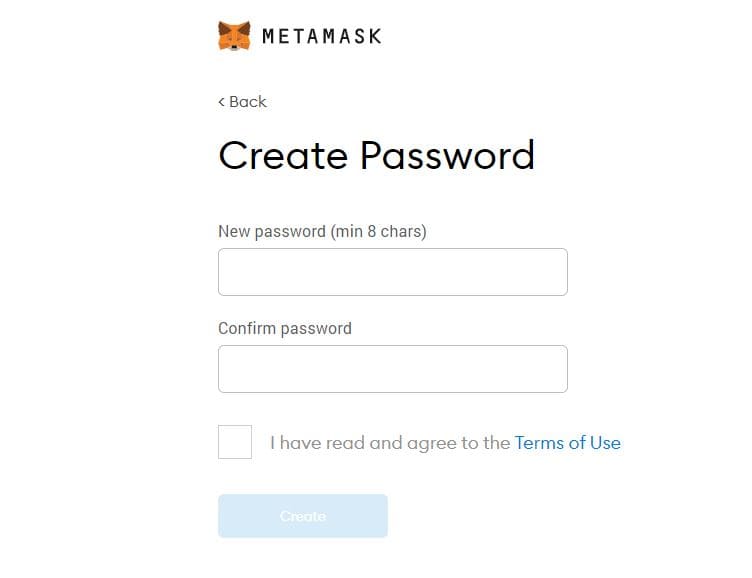
After putting your password, tick the box to agree to “Terms and Use” then select “Create” to continue.
4) WRITE AND KEEP YOUR SECRET BACKUP PHRASE
MetMask will show you your secret backup phrase, This is composed of 12 words that serves as your “Private Key” to your Ethereum wallet. This will allow you to backup and restore your account should you forget your password.
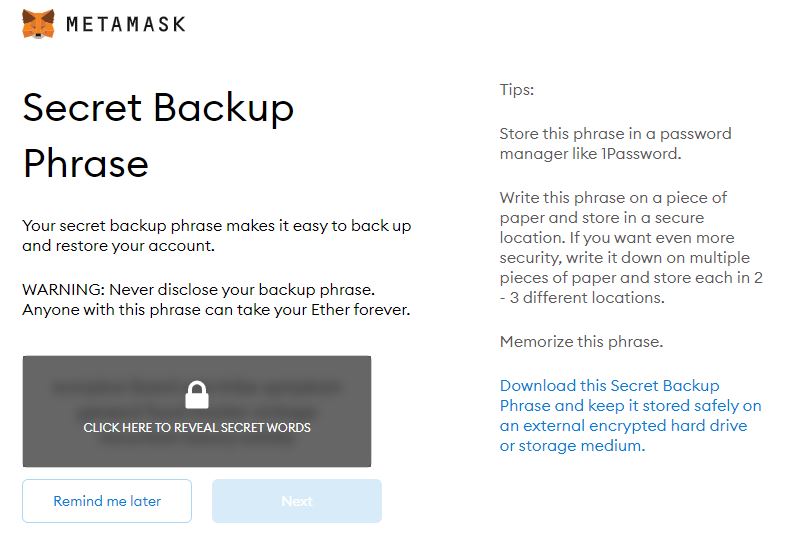
IMPORTANT: Download the Secret Phrase or write it down and keep it secure. MetaMask DOES NOT KNOW what your secret phrases are. It is unique to you So in the event that you forgot your secret phrase, no one will be able to help you.
(Also, know that when importing your MetaMask wallet, you will need the secret phase and not the password.)
After writing down your backup phrase, click “Next.”
5) Confirm your Secret Backup Phrase.
For this step, you will be asked to select your phrases in order to verify that you indeed wrote down your backup phrase. We’re not going to show a screenshot of this page.
Select “Confirm” to continue.
The next page just confirms that you are able to create your wallet.
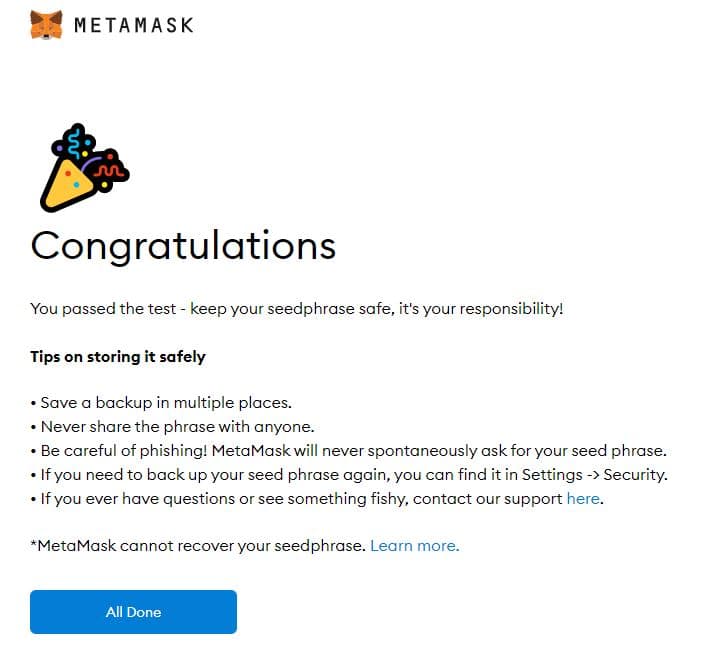
Tips to Keep Your MetaMask Safe
- Save a copy of your backup phrase in multiple places. We prefer that you write it down in notebooks, away from the Internet.
- Never share your backup phrase with anyone.
- Be careful of phishing. MetaMask will never ask for your backup seed phrase on a whim.
- If you forgot your backup phrase, you can still see it at Settings > Security.
The MetaMask Dashboard
Familiarize yourself with the MetaMask dashboard:
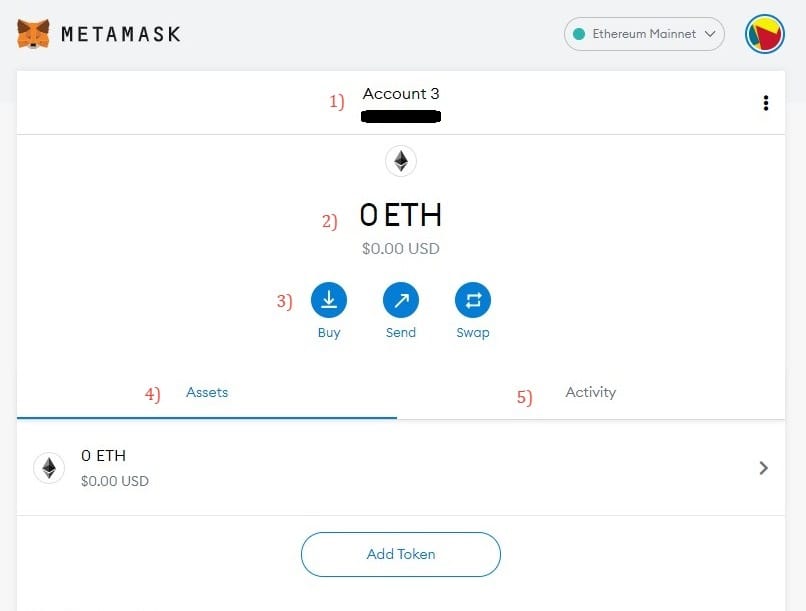
- Account. You can have more than one account within MetaMask. This is also your ETH address.
- The number ETH you have.
- The other things you can do within MetaMask. You can buy, send, and swap tokens.
- A list of your assets. Once you have more coins, it will be listed here.
- Things you did inside MetaMask.
How to Transfer ETH, Crypto to MetaMask
As you can see from the above, you can already buy inside MetaMask. But there are better ways to do this for Filipinos. This is through fiat onramps available locally.
Transfer ETH to MetaMask via BloomX
BloomX is a licensed virtual asset service provider in the Philippines.
- Go to BloomX’s Facebook Page.
- Tell them you want to buy ETH to transfer to MetaMask.
- BloomX will ask how much ETH you want to purchase and in your ETH address.
- BloomX will send indicative rates. Up to you to accept or not — feel free to compare to other crypto exchanges.
- Once you accept, BloomX will indicate where you can send them your Php.
- When BloomX receives your payment, they will transfer ETH to your MetaMask.
We have an article discussing how to transfer the cryptocurrency SLP, ETH, AXS to and from MetaMask using BloomX.
Transfer ETH to MetaMask via Coins.ph
- Just in case, register an account with Coins.ph.
- Add funds to your Coins.ph account.
- Convert your PHP to ETH within the app.
- Go to your ETH wallet within the app.
- Select “Send ETH”.
- Input your MetaMask ETH Address as destination or recipient of your ETH.
- Alternative, you can use QR Code
- On Coins.ph, Go to ETH Wallet > Send > Scan QR Code.
- On MetaMask, click “Buy” > Directly Deposit Ether > View Account.
- MetaMask will show you a QR Code version of your ETH address.
- Scan that with Coins.ph.
- Input how much you will transfer to MetaMask then confirm.
Transfer ETH to MetaMask via PDAX
- Log in to PDAX.
- Go to Funds (you’ll see this immediately).
- Select “Payment Out”.
- Choose ETH as the asset you want to withdraw. (This assumes you already have ETH.)
- Select “Transfer Out to Wallet.”
- Enter the MetaMask ETH Address.
- You will receive an email from PDAX to confirm the transaction. This step is mandatory.
Transfer ETH to MetaMask via Binance
- Go to your Spot Wallet.
- Select ETH. (This assumes you already have ETH.)
- Click “Withdraw.”
- Input the MetaMask ETH Address or use QR Code.
- Select Withdraw.
IMPORTANT REMINDER
Whether you copy the ETH address or use QR code, make sure you examine the ETH address you pasted. Crypto transactions are NON-REVERSIBLE. The exchanges above will not be able to help you if you input the wrong ETH Address.
How to Transfer Out from MetaMask to External Address
Simply click “Send” on the MetaMask dashboard then indicate the address where you will send the tokens.
NOTE: Make sure that you are sending the tokens to the correct address. Some exchanges, like Coins.ph, don’t accept other ETH-based (ERC-20) tokens so make sure you don’t accidentally send them your hard earned SLP or other coins.
For Axie Infinity Players, do not send your SLP/AXS to Coins.ph.
How to SWAP ETH to Other Coins in MetaMask
The easiest way to do SWAP ETH to other coins is within MetaMask itself. On the MetaMask dashboard, click SWAP. You will encounter this page:
(BEFORE DOING ANYTHING, MAKE SURE YOU READ THE ENTIRE ARTICLE THEN JUST COME BACK HERE AFTER YOU READ OUR NOTE ABOUT GAS FEES.)
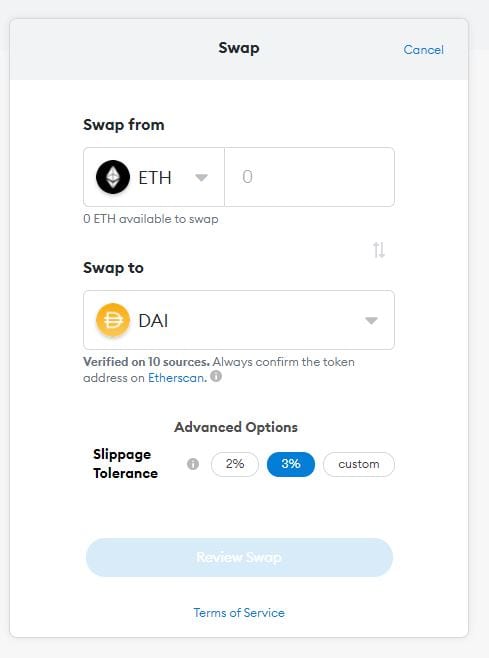
The TLDR version is you “Review Swap” then “Swap.”
What is Slippage Tolerance? Remember that crypto is volatile. Slippage is when the price changes between the moment the order is placed and the moment it is confirmed. The swap will be cancelled if the slippage exceeds your tolerance percentage.
Exchange ETH to Other Tokens Outside MetaMask (Uniswap Route)
At the beginning, we mentioned that MetaMask is your gateway to the decentralized web. It will allow you to interact with decentralized apps, exchanges, crypto art, and even games. Sometimes, the better way to trade ETH is to use a decentralized exchange like Uniswap.
This is Uniswap:
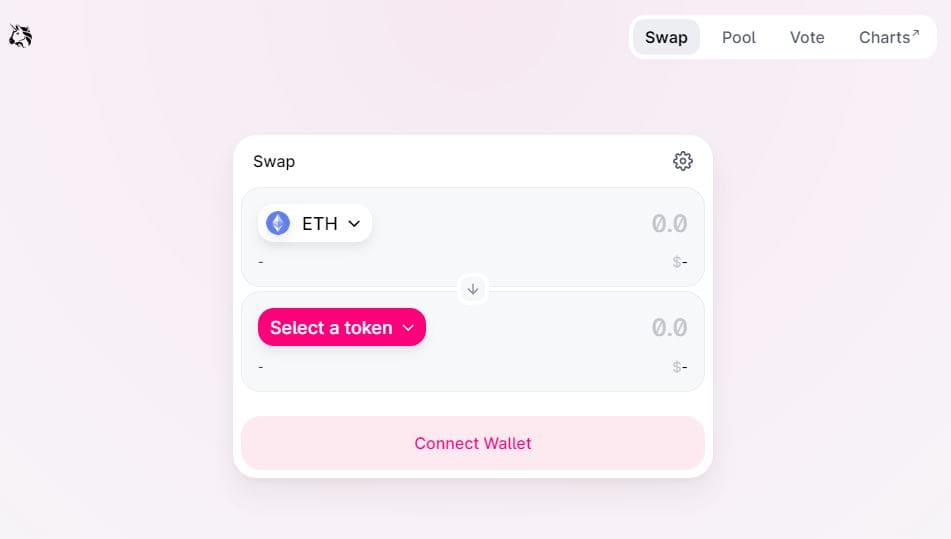
Uniswap is a decentralized exchange where its the people that provide liquidity to the trading pairs. We’ll discuss that in a separate article but for now, make sure you are in the correct Uniswap url: https://app.uniswap.org/#/swap?use=V2
Swap ETH to Other Coins Using Uniswap
1. Click “Connect Wallet.” (Refer to the image above.)
2. It will ask you to connect your MetaMask account so that it can interact with Uniswap.
3. Select a token. For now, let’s use DAI — a stablecoin.
4. Select “Swap” then “Confirm Swap.” You will see the image below:
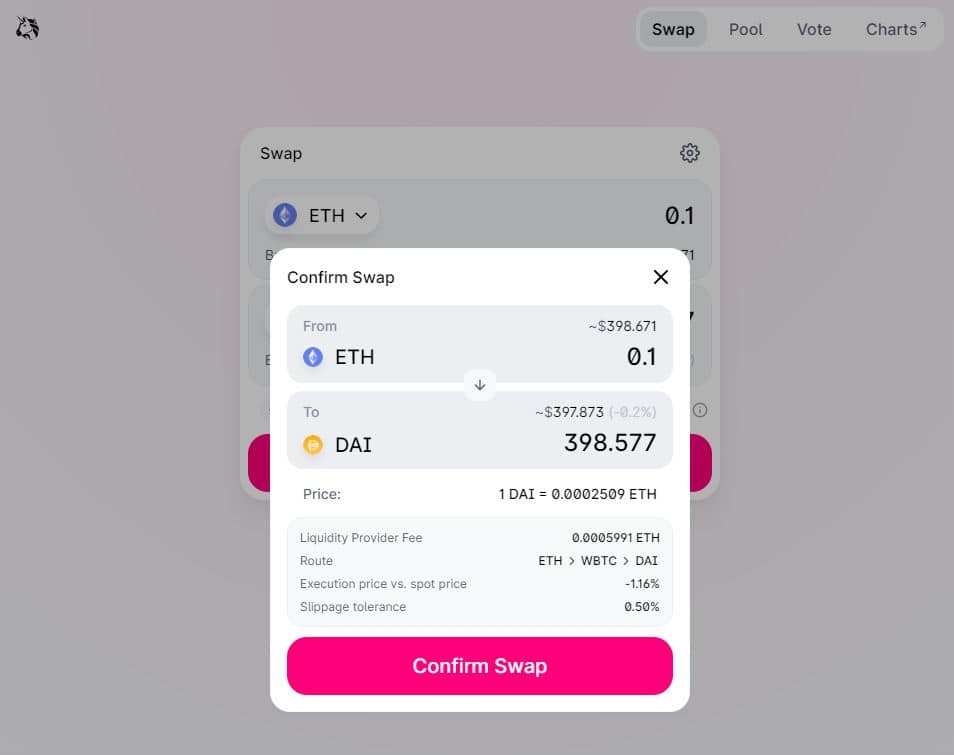
5. MetaMask will popup asking you to confirm the transaction.*
6. If you confirm, the transaction will proceed.
*Let’s go back to item 6. The popup will show you the conversion and the gas fee, which is the payment for using the Ethereum network. You can change the gas fee but it is recommended you change it depending on the prevailing rate, which you can find on Ethgasstation.info. Gas fees are sometimes very high or very low so make sure to time it correctly.
How to Add Tokens Manually to MetaMask
Wondering where’s the token you just swapped for? Don’t worry, It’s already there, you just need to add it manually so that MetaMask will show it. How?
1. Go to Token Page on Coingecko. We will Use the cryptocurrency called “Shiba Inu” in this example. (Note, this isn’t financial advice. I’m just using $SHIB as an example.)
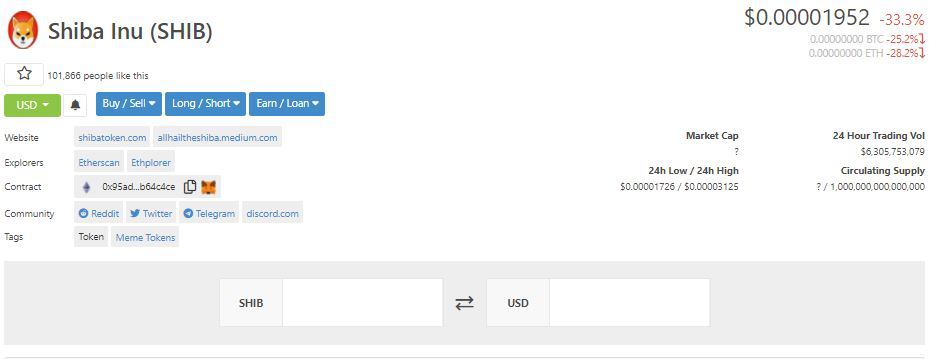
3. On the Contract label above, simply click the Fox icon to immediately add it to MetaMask.
Anything Else?
As your gateway to the world of decentralized web and decentralized finance, MetaMask is a powerful wallet integral to your experience within the Ethereum blockchain. Our final word is that you make sure you keep it secure and don’t go about connecting your MetaMask to just about every application that can connect it to. If you have more questions, contact us and we can help.
Also. Be mindful of the gas fees.
This article is published on BitPinas: How to Use MetaMask: A Guide for Filipinos



di po ba makaka pasok sa axie infinity market place pag wala pang laman MetaMask mo ilang besis ko na kasing ginawa connected naman sya pero di talaga nakaka pasok di ako nakaka punta sa stage nang maglalagay kana nang nckname po pakisagot po thanks
bakit po ganun pag kinacopy ko ung account ko sa metamask . iba lumalabas sa notepad
how to get PDAX account
pwede po ba gamitin ang isang metamask accout sa multiple na nft games?
Hello, sir na wwitdraw po ang 20 na usdt, sa metamask, smart chain network ko,?